Being a student can be difficult and stressful especially when it comes to maintaining a financial budget. Whether you are sick of your wardrobe or your best friends birthday is coming up we have some great DIY for a students on a dime. These easy DIY are the perfect way to give your already existing wardrobe some new accessories or that study hair a fresh twist. Sometimes you just have to rock what you got.
As a student I know how annoying it can be to have the perfectly styled outfit when those sweat pants and hoodie are calling your name. But with the perfect legging and over sized cardigan these fun and easy accessories will help to pull your carefree look together! We dare you to take the DIY challenge and jazz up your study style!
For our DIY projects a lot of the supplies that you will need will be kicking around your home and if not the dollar store is now your new best friend. So start searching—Ready Get Set Go!

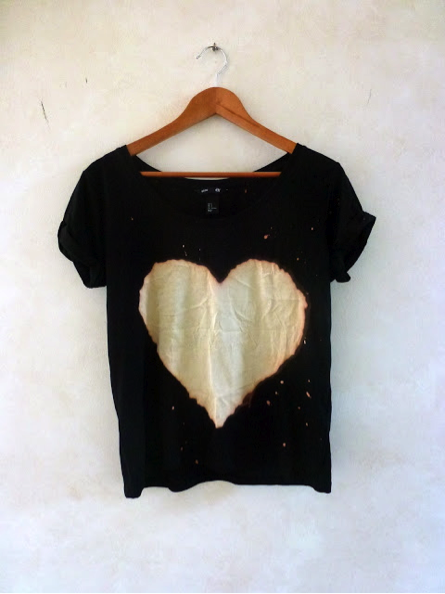
What a Bleach!
Graphic T-shirts are always a fun way to dress up any outfit. You can pair these fun T-shirts with boyfriend jeans, a skirt or even you leggings topped with your cozy cardigan. This DIY is simple and is a great opportunity to turn that shirt with a stain on it into a masterpiece.
What You Need:
-T-shirt
-Pencil
-Bleach
-Plastic Bowl.
-Paint Brush
-Cardboard
-Homemade Stencil (optional)
Steps
1. Take your t-shirt and place the piece of cardboard on the inside. This will prevent the bleach from leaking through to the other side.
2.Decide what you want to bleach on to your shirt. You can either do free hand or use a stencil. If you decide to do free hand use a pencil to mark out your design. This is your canvas of creativity!
3. Take your bleach and pour it into your plastic bowl. Use your paintbrush to drench your design. Be careful though not to get the bleach on the clothes you are already wearing.
4. Let the bleach dry for 20-30 minutes. Depending on the colour of shirt you use it may take less time. Dark shirts take longer then light coloured shirts.
5. Once you have the desired bleached spot rinse your design with cold water. Then wash your shirt in the washing machine.
Now you have a personalized, one of a kind graphic T-shirt, enjoy!
Hair-oine
Just don’t know what to do with your hair today? Happens to the best of us. These easy hair DIYs are perfect for pulling your hair off your face for practical situations such studying or writing an exam. Or just adding a little something to your school attire!
Crease Less Hair Ties
Don’t let your ordinary hair ties crimp your perfectly styled hair, these DIY hair elastics will keep your hair back, without any of the creases your old hair ties leave. These hair ties also look super cute layer on your wrist as bracelets. How perfect is that? Two looks in one!
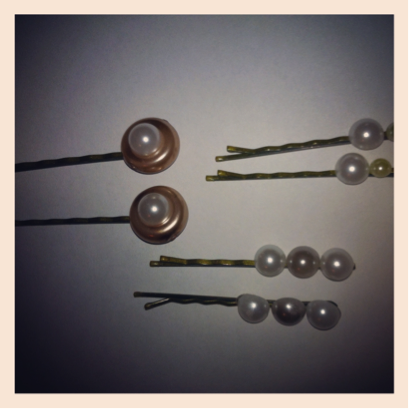
Sometimes we all just need a little decoration in our hair. This DIY is just that. The embellishment on the bobbie pins is perfect for a night on the town or just a ordinary day at school. One of the easiest DIYs around!
What You Need:
-Bobbie pins
-Beads
-Super Glue
Steps
1.Take your beads and place a drop of super glue on the back.
2.Place your beads on the bobbie pin creating a desired design.
3.Let the glue dry for 20 minutes. After that your pins are ready to use.
Paper Clip Earrings
You can never go wrong with a statement earring. But sometimes statements earrings can be heavy on the ears and the wallets. Lightweight earrings are the perfect way to accessorize a simple outfit and will always be the center of everyone’s attention.
What You Need:
-Old Earring Hooks
-Paper Clips
-String (any colour)
-Crazy Glue
Steps
1.Take the paperclip and unfold the paperclip at each of the bends.
2. Form the paperclip into the shape of a triangle.
3. Slide your earring hook onto the triangle to any desired point.
3. Take your string and wrap it around to your desired design. You can make the design abstract and open or weaved close together. Make it your own.
4. Secure the ends with a drop of crazy glue to secure.
Note: Depending on the colour of string you use the different style you will give the earrings. The brown used here gives the earring a boho look.
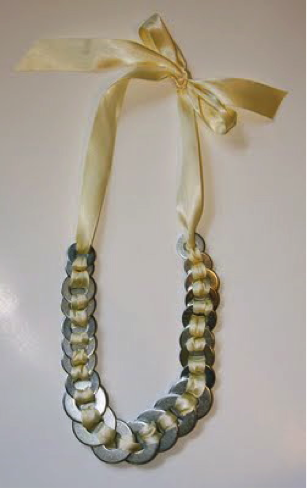
Looking for a statement necklace to dress up that basic outfit? These washer necklaces are super simple to make and are awesome gifts for friends! Make sure you have patience, because this DIY will take time and coordination.
Steps
- Cut your ribbon to the desired length for your necklace. Add on a couple inches to insure the necklace stays that length once the washers are added.
- String two washers onto the ribbon.
- Weave the left side of the ribbon threw to the second washer.
- Weave the same end of the ribbon back threw to the first washer.
- Then back threw the second washer. It will be like creating a figure eight with the ribbon and the washer.
- Add on the third washer and repeat steps 4-5 with washer two and three.
- Complete the same combination of steps for all the remainder washers.


